
How to Merge Documents to Word or PDF using Xbridger Document Manager in Power Automate
To get started you need a X-Key (API Key). If you already have one, go ahead and follow the instruction below otherwise sign up for trial or sign in to our Admin Portal to get your X-Key.
Note the steps in this article describe how to use Xbridger’s Merge Word documents and Merge documents to PDF actions to combine multiple files into one. The steps are the same for the most part. We will indicate where you need to make specific settings for each action.
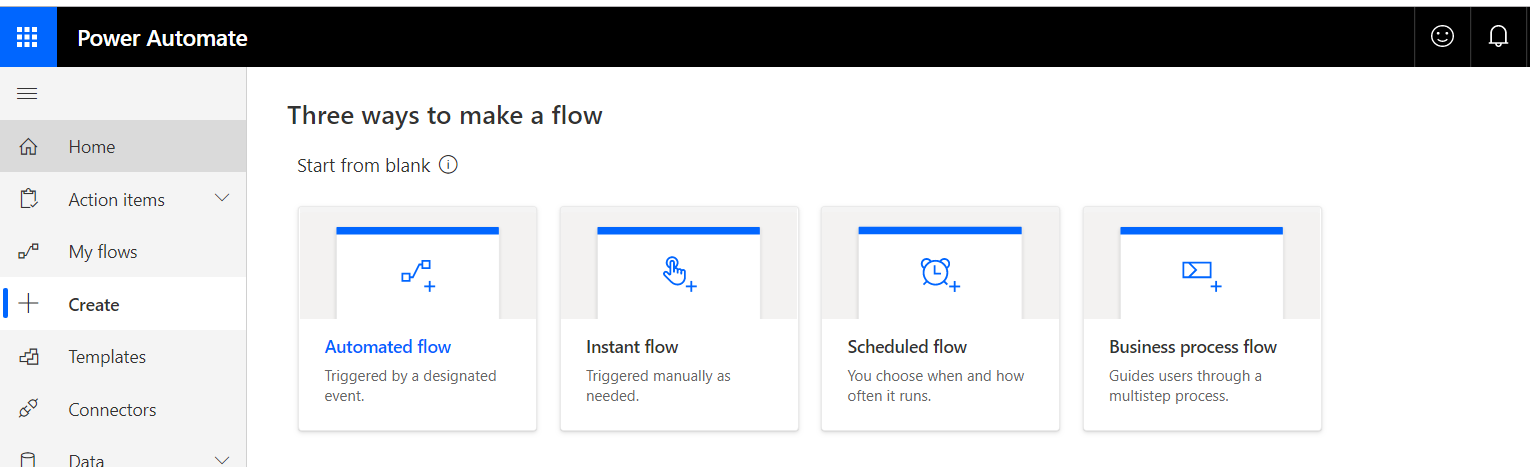
1. Navigate to https://flow.microsoft.com/
2. Select Createand click Automated flow
3. Click Skip, on the next page name your flow say Merge Document
4. Search for Manually trigger a flow action. Note you can use any trigger of your choice. For this article we are using manual trigger.
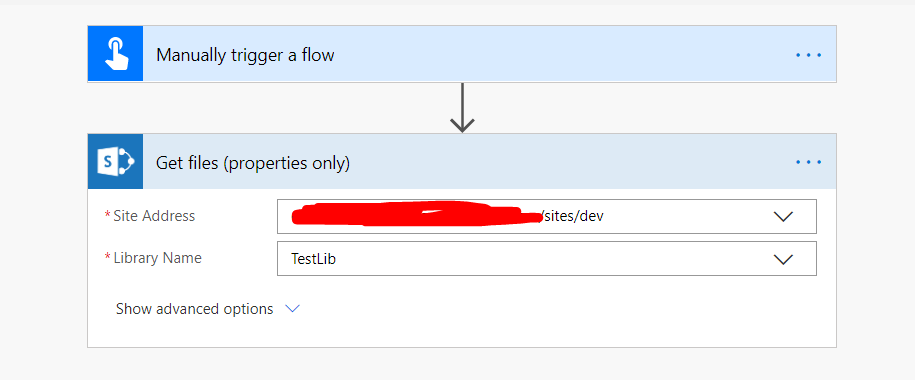
5. Click New Step and select Get files (properties only) action step. Select the site address and select the library where the documents you want to merge are located. Note if you are using the Merge word documents action, all the documents must be Word documents in docx extension. Please refer to https://xbridger.com/docs/ for more information on supported file type.
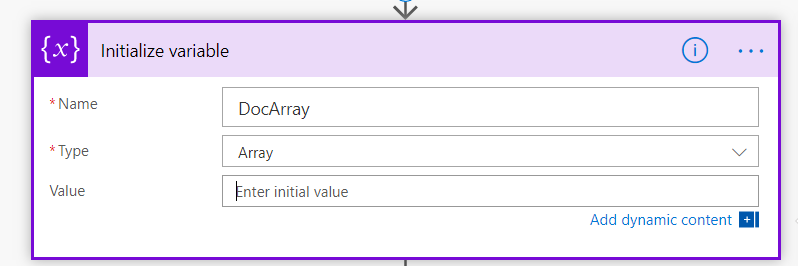
6. Click New Step and search for Initialize Variable. Give name and type as in the below image
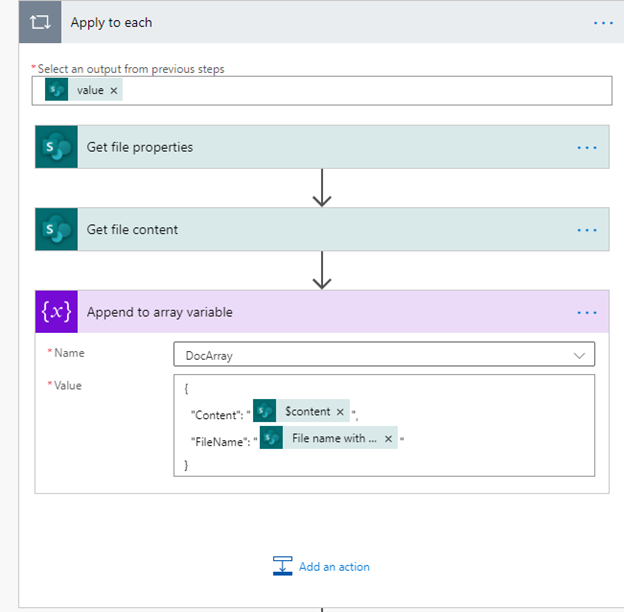
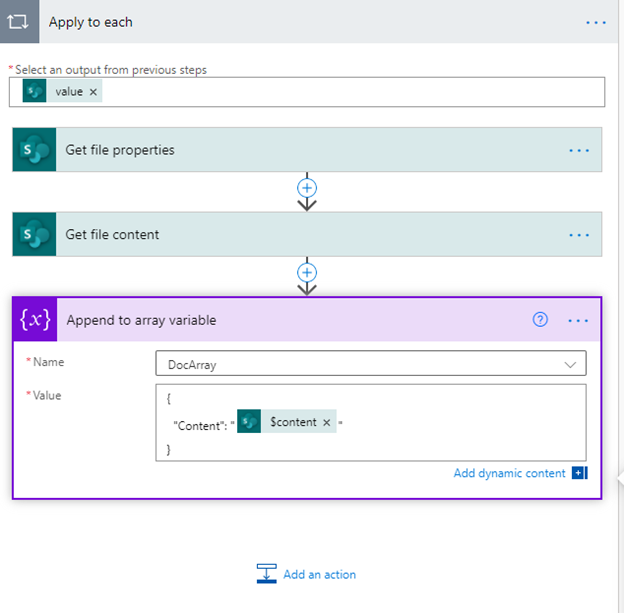
7. Add Apply to each action step. In the Apply to each, select Value from the dynamic content of Get files (properties only)
8. Add Get file properties inside the Apply to each and select the same library where you have documents to merge. Then select ID from Get files (properties only) dynamic content.

9. Add SharePoint Get file content action step within the Apply to each after Get file properties. Select same site address i.e. where your library is located and select Identifier in the dynamic content. Identifier is a dynamic content from Get file properties.
10. Add Append to array variable action after Get file properties step inside the Apply to each. In the Name select DocArray, that is the variable you initialized in step 6. Add the following JSON object in the Value if you are using the Merge documents to PDF action
{
“Content”: @{body(‘Get_file_content’)?[‘$content’]},
“FileName”: @{body(‘Get_file_properties’)?[‘{FilenameWithExtension}’]}
}
Or add the following JSON object if you are using the Merge Word documents action. Note you can use the above JSON object for processing Word documents as well but for merging to PDF the FileName filed is required.
{
“Content”: @{body(‘Get_file_content’)?[‘$content’]}
}
Note: If you copy and paste, you may need to change the double quote format
Your Apply to each should look like this for Merge documents to PDF
Or for Merge Word documents action
11.Add Compose action after Apply to each action step. In the Input field, select DocArray variable.
12. Add Xbridger’s Merge documents to PDFor Merge Word documents action and configure as follows

Note: We passed the output of the Compose action in the Merge documents to PDF action or Merge Word documents action depending on which one you are using.
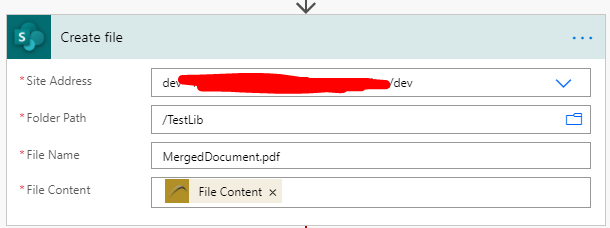
13. Finally add Create file action step and pass the output of Merge documents to PDF in the File Content field.
Or for Merge Word documents action

In the Site Address and Folder Path, select the destination site and library/folder where you want the merged document saved to. In the File Name type MergedDocument.pdf (or MergedDocument.docx) and In the File Content, select Output from the dynamic content of the Merge documents to PDF action in step 12.
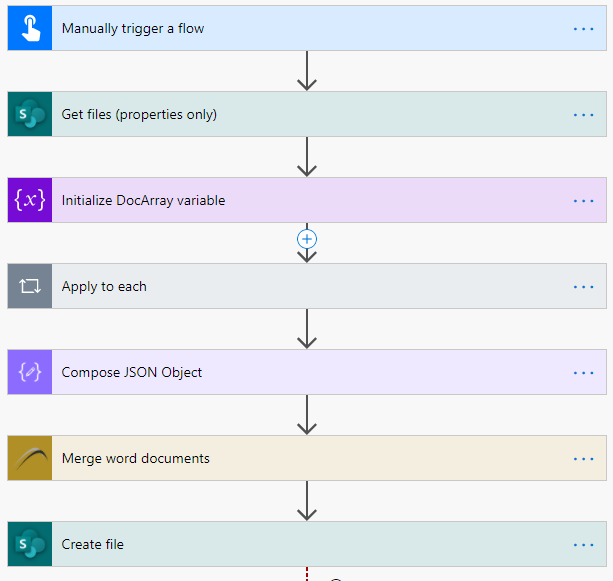
The Flow steps should look like this if everything is set up correctly
14. Save your changes.
Note: To order the documents in a specific order, create a column of type Number in the library where the documents to merge are stored, name it ItemOrder. Then edit the view for the library, in the Sort section select ItemOrder and click Show items in ascending order. Then edit properties of each document and enter the number for each document in ItemOrder column in the order you want them to appear in the final document. In Flow, edit Get files (properties only) in step 5, click Show advanced options, in the Order By type ItemOrder. This will order you documents in the order you want them in the final document.
Now you are ready to test your flow. In the upper right corner, click Test and select I’ll perform the trigger action then click Save & Test to run the flow. If everything works fine you should see your merged document in the library you set as destination in the Create file action step.
If you need any help do not hesitate to contact us via support@xbridger.com.