
How to export a List or Library metadata to PDF using Power Automate and Xbridger Document Manager
Prerequisite
To complete these steps, you need
- An X-key. Sign in or register at https://account.xbridger.com to get an X-key. You will need the key to create a connection to Xbridger connector in Power Automate.
Note: This action only supports 4 columns with first group in the view you are exporting.
If you will like to have Export to PDF button available in your library’s or List’s ribbon as an extension, you can download our app and upload to your App catalog. For details on that click here.
1. Let’s start by creating a view to export. Go to the library or list you want to export into pdf and create a view say demo view.
2. In the view select any 4 columns you want to export. Optional- under the Group By section select the column you want to use to group the data in the First group by the column. This is the setting in my demo view. Your view should look similar.


3. Click Ok when done to go back to the library
4. We will need the view id of the view we had just created. To get the id, click on the library to refresh and select the view from the view dropdown list. Copy the value for viewid in the url query string

Note: Switch between views to get id for other views including the default view.
5. Now let’s head to Power Automate and create our Flow. In Power Automate add Manually trigger a flow action as trigger for our flow. Note you can always use any trigger of your choice depending on your business requirement.
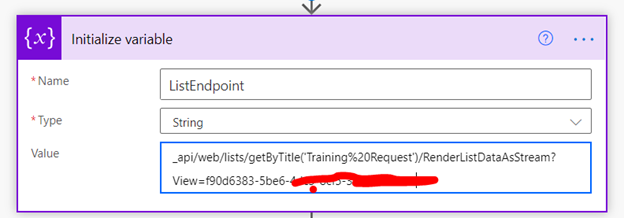
6. Lets add Initialize variable to set the url we will be making http request to. Pass the following endpoint in the Value field:
_api/web/lists/getByTitle(‘YourLibrary-Or-List’)/RenderListDataAsStream?View={your_view_id}
Replace {your_view_id} with the view id you copied in step 4. Note if you don’t add the id the default view will be exported. And replace YourLibrary-Or-List with the title of your library or list.
7. Add Send an Http request to SharePoint action and configure it as shown below
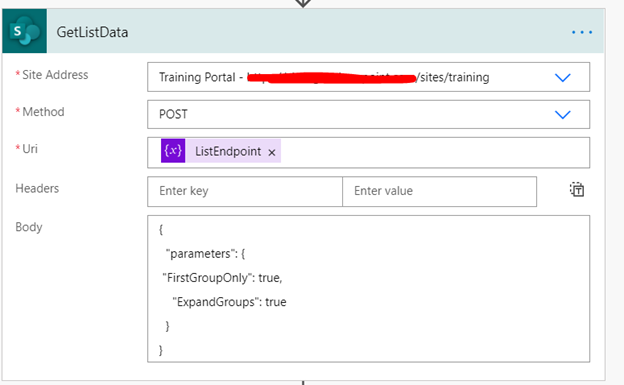
Set the Site Address and in the Uri pass the dynamic content of the Initialize variable we set in step 6. Here we are sending a request to the list to fetch it’s data.
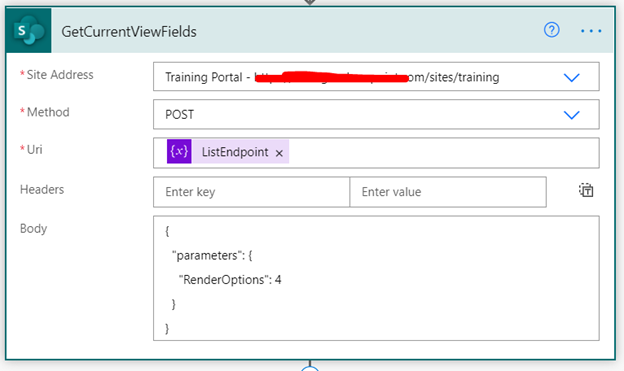
8. Lets send another request to the fields in the current view. Add another Send an Http request to SharePoint action and configure as shown in the image below
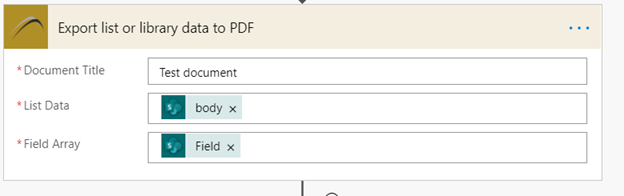
9. Now add Xbridger Export list or library data to PDF action. In the Document Title, enter a name. This is the name that will show in the header section of the generated PDF document.
In the List Data select body from the dynamic content of Send an Http request to SharePoint in step 7 or use this regular expression body(‘Send_an_Http_request_to_SharePoint’)?[‘body’] to extract body response from the Send http request. Or you can simply copy and paste @{outputs(‘Send_an_Http_request_to_SharePoint’)?[‘body’]}. If you change the name of your actions, note to change the name in the regular expression too.
For Field Array: We use regular expression body(‘Send_an_Http_request_to_SharePoint2’)?[‘Field’] to get value for Field in the JSON response. Or you can simply copy and paste @{body(‘Send_an_Http_request_to_SharePoint2’)?[‘Field’]}.
10. The final step is to create the PDF file in a library. Add Create file action from SharePoint connector, and set it up as shown

Set the Folder Path to the library where you want the file get created. Set a name for the generated PDF. In the File Content, select File Content from the output of the Export list or library data to PDF in the Dynamic content.
It’s all set! Now save and test.
If you need any help do not hesitate to contact us via support@xbridger.com.